Introduction
Unity is a powerful game engine known for its flexibility and ease of use. One of its core features that greatly impacts the look and performance of your game or app is the Render Pipeline. Unity offers multiple render pipelines, each designed for different needs and platforms.
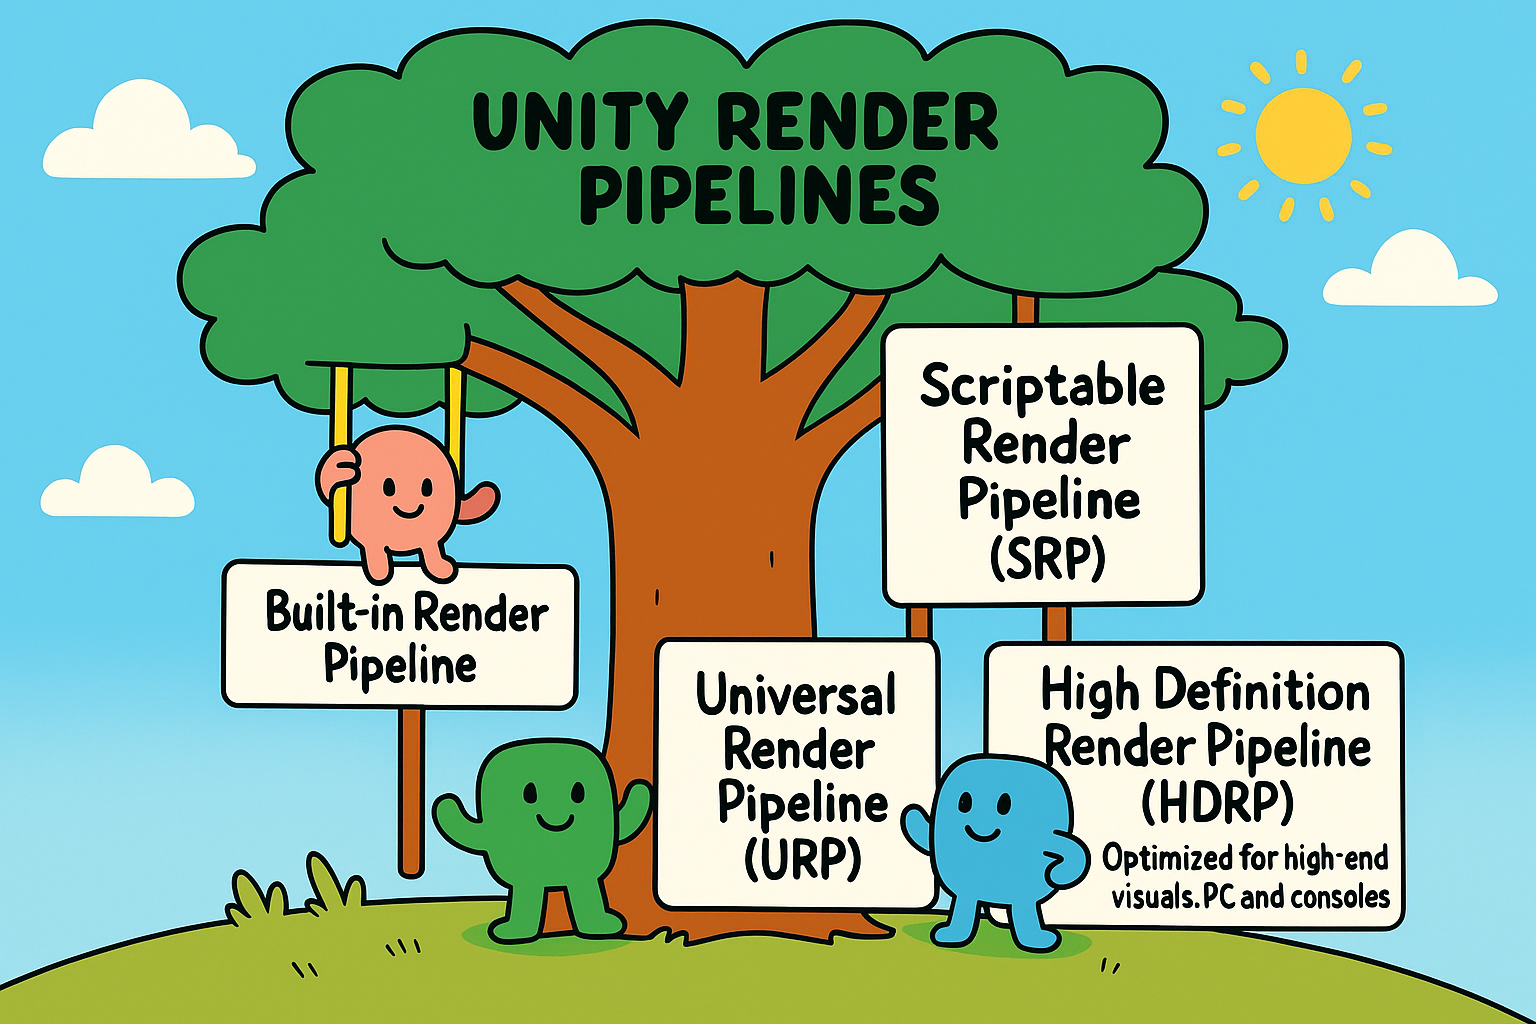
In this post, we’ll explore Unity’s three main render pipelines:
- Built-in Render Pipeline
- Universal Render Pipeline (URP)
- High Definition Render Pipeline (HDRP)
We’ll break down what each one does, their key differences, and when to use them to get the best results for your project.
Before diving into the details of each pipeline, let’s explain some terminology. More specifically I look into what the Scriptable Render Pipeline (SRP) is, as this is a term that will often come up. U’ll also briefly explain what forward and deferred rendering means.
Scriptable Render Pipeline
SRP stands for Scriptable Render Pipeline, and it’s a core rendering architecture introduced by Unity to replace the older, more rigid Built-in Render Pipeline. Think of SRP as the foundation or framework that allows developers (and Unity itself) to customize and control how rendering works at a lower level than before.
Before SRP, Unity’s Built-in pipeline had a fixed rendering process. If you wanted to change how lighting or shading worked, you’d have to hack around Unity’s internals, which wasn’t ideal.
With SRP, Unity exposes the entire rendering process via C# scripts, allowing:
- Full control over how objects are drawn.
- The ability to build custom render pipelines.
- More performance optimization opportunities for different hardware or use cases.
How does SRP related to URP and HDRP
URP and HDRP are both built on top of SRP. They are prebuilt SRP-based render pipelines, designed by Unity to serve different project needs:
| Pipeline | Built With SRP? | Purpose |
|---|---|---|
| URP | Yes | Optimized for performance and scalability across platforms (mobile to console). |
| HDRP | Yes | Built for high-end visuals, realistic lighting, and advanced effects. |
| Built-in | No | Legacy pipeline with a fixed rendering process. Not based on SRP. |
So, SRP is not a pipeline itself, but rather the underlying system that allows Unity to create URP, HDRP, and even custom pipelines if you want to build your own rendering system.
Why SRP Matters:
- Customization: You can create tailored rendering solutions.
- Performance: Optimized rendering paths for specific platforms or hardware.
- Modernization: Enables features like Shader Graph, custom lighting models, etc.
Forward vs Deferred rendering
Forward rendering and deferred rendering are both types of rendering techniques used in real-time graphics. They are often called rendering paths or rendering pipelines because they describe the sequence and method of how the GPU processes and draws the scene.
Forward Rendering
- The scene is rendered one object at a time.
- For each object lighting calculations are done for every light affecting that object.
- The final color for each pixel is computed as the scene is drawn, including shading and lighting. This means lighting is applied during the geometry pass (while the object is drawn).
| Pros | Cons |
|---|---|
| Simpler to implement | Performance decreases with many lights since each object is shaded multiple times |
| Works well with a small number of lights | Lighting cost scales linearly with number of lights |
| Supports transparent objects easily | Harder to handle complex lighting models and many dynamic lights efficiently |
| Compatible with older hardware |
Deferred Rendering
Rendering is split into two main passes:
- Geometry pass: Render scene geometry and store material properties (like position, normal, albedo/diffuse color, specular info) into multiple render targets called the G-buffer.
- Lighting pass: Use the data in the G-buffer to calculate lighting per pixel, processing all lights in screen space after geometry has been drawn.
Because lighting is done once per pixel using stored material info, not per object, lighting calculations are decoupled from geometry complexity.
| Pros | Cons |
|---|---|
| Handles many lights efficiently, because lighting is done once per pixel | Requires more GPU memory (due to G-buffer) |
| Better performance when lots of dynamic lights are present | More complex to implement |
| Allows more complex lighting models | Transparency is harder to handle |
| Lighting is decoupled from geometry rendering | Some hardware limitations on multiple render targets |
| Overhead in filling and reading the G-buffer |
Built-in Render Pipeline
The Built-in Render Pipeline is Unity’s original rendering system. It has been the default for many years and is very flexible, working across a wide range of platforms, from mobile devices to consoles and PCs.
| Pros | Cons |
|---|---|
| Mature and stable. | Lacks modern optimizations out of the box. |
| Compatible with most existing assets and shaders. | Harder to maintain and scale for modern graphics needs. |
| Broad platform support. | No support for newer features like Shader Graph or SRP workflows. |
| Easy to extend with custom shaders and effects. |
Features
- Forward and deferred rendering paths.
- Shader system based on Unity’s legacy shaders, highly customizable with Surface Shaders and ShaderLab.
When to use it
- For projects that rely heavily on legacy assets and shaders.
- When you need maximum compatibility across many platforms.
- Small or prototype projects that don’t require advanced visuals.
Universal Render Pipeline (URP)
URP is Unity’s modern, scriptable render pipeline designed to be lightweight and scalable. It targets a wide range of devices, from mobile to mid-range PCs and consoles.
| Pros | Cons |
|---|---|
| Cross-platform and highly scalable. | Some visual effects and features are limited compared to HDRP. |
| Better performance than the built-in pipeline on many devices. | May require migrating assets and shaders from Built-in pipeline. |
| Easy to create and modify shaders with Shader Graph. | Not as high-fidelity as HDRP for cutting-edge visuals. |
| Supports modern rendering features like post-processing and volumetrics. |
Features
- Fully Scriptable Render Pipeline (SRP). Uses a single-pass forward renderer by default.
- Supports Shader Graph, enabling visual shader creation.
- Highly optimized for performance on lower-end hardware.
When to use it
- Projects targeting mobile devices, VR, AR, or low to mid-range hardware.
- When you want a good balance between performance and quality.
- Developers who want modern workflows with Shader Graph and SRP flexibility.
High Definition Render Pipeline (HDRP)
HDRP is Unity’s high-fidelity render pipeline designed for PC and consoles, aiming to deliver photorealistic visuals and advanced rendering techniques.
Features
- Uses deferred rendering by default.
- Supports advanced features like ray tracing, volumetric lighting, and screen-space reflections.
- Shader Graph compatible but optimized for high-end hardware.
- Requires modern GPUs with high performance.
| Pros | Cons |
|---|---|
| State-of-the-art visuals with real-time lighting and effects | Not suitable for low-end or mobile devices |
| Supports cinematic quality rendering | More complex to set up and optimize |
| Advanced post-processing and rendering techniques | Requires migration of assets and shaders from other pipelines |
| Ideal for architectural visualization, AAA games, and film |
When to use it
- High-end PC and console projects aiming for cutting-edge visuals.
- Architectural visualization or cinematic projects.
- When realistic lighting and detailed effects are critical.
Custom Shaders
Here’s an example with subshaders written for all three rendering pipelines. Note that the respective SubShader blocks are wrapped in pipeline specific #ifdefs. This avoids errors from missing includes if a pipeline’s package isn’t installed. It also improves shader compilation times and clarity.
Shader "Custom/MultiPipelineUnlit"
{
    Properties
    {
        _Color("Color", Color) = (1,1,1,1)
    }

    // URP SubShader
    #ifdef UNITY_PIPELINE_UNIVERSAL
    SubShader
    {
        Tags { "RenderPipeline" = "UniversalRenderPipeline" }

        Pass
        {
            Name "Unlit"
            Tags { "LightMode" = "UniversalForward" }

            HLSLPROGRAM

            #pragma vertex vert
            #pragma fragment frag
            #include "Packages/com.unity.render-pipelines.universal/ShaderLibrary/Core.hlsl"

            float4 _Color;

            struct Attributes
            {
                float4 positionOS : POSITION;
            };

            struct Varyings
            {
                float4 positionCS : SV_POSITION;
            };

            Varyings vert(Attributes input)
            {
                Varyings o;
                o.positionCS = TransformObjectToHClip(input.positionOS.xyz);
                return o;
            }

            float4 frag(Varyings i) : SV_Target
            {
                return _Color;
            }

            ENDHLSL
        }
    }
    #endif // UNITY_PIPELINE_UNIVERSAL


    // HDRP SubShader
    #ifdef UNITY_PIPELINE_HD
    SubShader
    {
        Tags { "RenderPipeline" = "HDRenderPipeline" }

        Pass
        {
            Name "Unlit"
            Tags { "LightMode" = "ForwardOnly" }

            HLSLPROGRAM

            #pragma vertex Vert
            #pragma fragment Frag
            #pragma target 4.5

            #include "Packages/com.unity.render-pipelines.core/ShaderLibrary/Common.hlsl"
            #include "Packages/com.unity.render-pipelines.high-definition/Runtime/ShaderLibrary/ShaderVariables.hlsl"
            #include "Packages/com.unity.render-pipelines.high-definition/Runtime/Material/Material.hlsl"

            float4 _Color;

            struct Attributes
            {
                float3 positionOS : POSITION;
            };

            struct Varyings
            {
                float4 positionCS : SV_POSITION;
            };

            Varyings Vert(Attributes input)
            {
                Varyings output;
                float3 positionWS = TransformObjectToWorld(input.positionOS);
                output.positionCS = TransformWorldToHClip(positionWS);
                return output;
            }

            float4 Frag(Varyings input) : SV_Target
            {
                return _Color;
            }

            ENDHLSL
        }
    }
    #endif // UNITY_PIPELINE_HD


    // Built-in RP fallback SubShader
    #if !defined(UNITY_PIPELINE_HD) && !defined(UNITY_PIPELINE_UNIVERSAL)
    SubShader
    {
        Tags { "RenderType" = "Opaque" }

        Pass
        {
            Name "Unlit"
            Tags { "LightMode" = "ForwardBase" }

            CGPROGRAM

            #pragma vertex vert
            #pragma fragment frag
            #include "UnityCG.cginc"

            fixed4 _Color;

            struct appdata
            {
                float4 vertex : POSITION;
            };

            struct v2f
            {
                float4 pos : SV_POSITION;
            };

            v2f vert(appdata v)
            {
                v2f o;
                o.pos = UnityObjectToClipPos(v.vertex);
                return o;
            }

            fixed4 frag(v2f i) : SV_Target
            {
                return _Color;
            }

            ENDCG
        }
    }
    #endif
}
Customizing or extending the render pipeline
Customizing the render pipeline in Unity allows developers to inject custom behavior, rendering effects, and logic into the rendering process. Depending on the render pipeline being used: Built-in, URP, or HDRP, Unity provides different mechanisms to extend and control rendering beyond standard materials and shaders. Whether the user wants to draw additional geometry, apply full-screen effects, or manipulate rendering at specific stages, Unity offers tools like Command Buffers, Render Features, and Custom Passes to help achieve fine-grained control over how scenes are rendered.
Here’s a summary of what is supported in each rendering pipeline:
| Feature / Technique | Built-in | URP | HDRP |
|---|---|---|---|
| Command Buffers | Supported via Camera.AddCommandBuffer | Not used directly | Not used directly |
| Custom Passes | Not available | Not available | Supported via CustomPassVolume |
| Render Features / Passes | Not available | ScriptableRendererFeature + RenderPass | Not available (uses Custom Passes instead) |
| OnRenderImage / Image Effects | Legacy method for post effects | Deprecated / not supported | Not supported |
| Replacement Shaders | Supported | Not supported out of the box | Not supported out of the box |
| Immediate Mode (GL, Gizmos) | Supported | Limited / not recommended | Limited / not recommended |
| Full-screen Effects | Via Blit in OnRenderImage() or CmdBuffer | Via custom RenderPass or post-process | Via Fullscreen Custom Passes |
| Custom Object Rendering | DrawMesh with CommandBuffer | RenderPass + filtering + material override | DrawRenderers custom pass |
| Custom Post-processing | Via OnRenderImage() | With URP PostProcess injection | With Custom Fullscreen Passes |
| Camera Stacking | Not available | Supported (Base + Overlay) | Not supported |
| Render Graph | Not available | Not available | Internal (not directly exposed) |
Next, I’ll go over the predominant method of extending each render pipeline in some more detail. I’ll showcase how this works in each case by implementing a simple outline effect.
Built-in: Command buffers
A Command Buffer is a low-level API to record GPU rendering commands ahead of time. It creates a list of commands (draw calls, state changes, clears, blits, etc.) and then executes them later during rendering. This allows injecting custom rendering logic at various points in the render pipeline.
| Term | Description |
|---|---|
| CommandBuffer | An object where you record commands (like DrawMesh, Blit). |
| CameraEvent | Predefined points in camera rendering where you can attach Command Buffers. Examples: BeforeForwardOpaque, AfterSkybox, etc. |
| Graphics.ExecuteCommandBuffer() | Immediate execution of commands. Less common; usually you add Command Buffers to cameras for automatic execution. |
In general, command buffers can be used to:
- Add custom effects or rendering steps without modifying Unity’s core pipeline.
- Execute commands at precise moments (before or after specific camera events).
- Extend or customize rendering in Built-in RP where no official render pass system exists.
More specific use cases:
- Render a fullscreen quad for a custom post-process effect.
- Render an additional mesh with a special material.
- Copy the framebuffer and modify it.
- Inject shadows or decals.
- Do custom render passes without rewriting the whole pipeline.
Command Buffers are executed on the GPU as part of rendering. They require some understanding of GPU state and rendering order. They are the primary way to customize Built-in RP rendering beyond what’s exposed in materials/shaders.
Example
Step 1: Create a minimal shader for outlining:
Shader "Custom/Outline"
{
    Properties
    {
        _OutlineColor ("Outline Color", Color) = (0,0,0,1)
        _OutlineThickness ("Outline Thickness", Float) = 0.03
    }
    SubShader
    {
        Tags { "RenderType"="Opaque" }
        Pass
        {
            Name "Outline"

            // Cull front faces so we render only the backfaces (creates silhouette)
            Cull Front

            // Enable depth writing so it contributes to the depth buffer
            ZWrite On

            // Only draw pixels that are in front of or equal to what's already drawn
            ZTest LEqual

            CGPROGRAM
            #pragma vertex vert
            #pragma fragment frag
            #include "UnityCG.cginc"

            fixed4 _OutlineColor;
            float _OutlineThickness;

            struct appdata
            {
                float4 vertex : POSITION;
                float3 normal : NORMAL;
            };

            struct v2f
            {
                float4 pos : SV_POSITION;
            };

            v2f vert(appdata v)
            {
                v2f o;

                // Move vertex outward along its normal
                float3 offset = normalize(v.normal) * _OutlineThickness;
                float4 expanded = v.vertex + float4(offset, 0);

                o.pos = UnityObjectToClipPos(expanded);
                return o;
            }

            fixed4 frag(v2f i) : SV_Target
            {
                return _OutlineColor;
            }
            ENDCG
        }
    }
}
Step 2: Create a MomoBehaviour to wrap the rendering logic:
using UnityEngine;
using UnityEngine.Rendering;

[RequireComponent(typeof(Renderer))]
public class OutlineEffect : MonoBehaviour
{
    // Public settings for the outline's appearance
    public Color outlineColor = Color.black;
    public float outlineThickness = 0.03f;

    // Internal references
    private CommandBuffer commandBuffer;     // Command buffer for custom draw
    private Material outlineMaterial;        // Material with the outline shader
    private Renderer targetRenderer;         // Renderer of this GameObject
    private Camera cam;                      // Main camera

    void OnEnable()
    {
        // Find the custom outline shader in the project
        var shader = Shader.Find("Custom/Outline");
        if (shader == null)
        {
            Debug.LogError("Outline shader not found");
            return;
        }

        // Create the material and set initial parameters
        outlineMaterial = new Material(shader);
        outlineMaterial.SetColor("_OutlineColor", outlineColor);
        outlineMaterial.SetFloat("_OutlineThickness", outlineThickness);

        // Get the target mesh renderer
        targetRenderer = GetComponent<Renderer>();

        // Get the main camera
        cam = Camera.main;

        // Create a new command buffer
        commandBuffer = new CommandBuffer();
        commandBuffer.name = "Outline Command Buffer";

        // Instruct the command buffer to draw the target renderer using
        // the outline material (expanded mesh)
        commandBuffer.DrawRenderer(targetRenderer, outlineMaterial);

        // Attach the command buffer to the camera's rendering pipeline
        // before opaque geometry is rendered
        cam.AddCommandBuffer(CameraEvent.AfterForwardOpaque, commandBuffer);
    }

    void OnDisable()
    {
        // Remove the command buffer from the camera when the object is disabled
        if (cam != null && commandBuffer != null)
        {
            cam.RemoveCommandBuffer(CameraEvent.BeforeForwardOpaque, commandBuffer);
        }
    }

    void OnValidate()
    {
        // Update material parameters in the editor when values change
        if (outlineMaterial != null)
        {
            outlineMaterial.SetColor("_OutlineColor", outlineColor);
            outlineMaterial.SetFloat("_OutlineThickness", outlineThickness);
        }
    }
}
Multiple rendering commands can be added into a single CommandBuffer, by chaining them to the same buffer like below.
// 1. Fullscreen overlay blit (already there)
cmdBuffer.Blit(null, BuiltinRenderTextureType.CameraTarget, overlayMaterial);

// 2. Draw a custom mesh (e.g., a simple quad or cube)
Mesh cubeMesh = GameObject.CreatePrimitive(PrimitiveType.Cube).GetComponent<MeshFilter>().sharedMesh;
Matrix4x4 matrix = Matrix4x4.TRS(Vector3.zero, Quaternion.identity, Vector3.one * 0.5f);
Material meshMaterial = new Material(Shader.Find("Standard"));
meshMaterial.color = Color.green;
cmdBuffer.DrawMesh(cubeMesh, matrix, meshMaterial);

// 3. Set a global float (could be used in shaders)
cmdBuffer.SetGlobalFloat("_MyGlobalTime", Time.time);
Render passes / Render features
A Render Feature is a scriptable object that adds one or more custom render passes to the URP renderer. A Render Pass contains the actual rendering logic, like performing a blit, drawing meshes, setting render targets, etc. They are both added via the URP Forward Renderer Data asset.
Render Features and Passes in URP provide a flexible, modular way to extend the rendering pipeline without modifying the engine or the pipeline source code. They are the URP-approved mechanism for injecting custom behavior at specific points in the frame rendering process.
Here’s why they’re useful:
- Custom Drawing Logic: Render objects with specific materials, layers, or conditions. Perfect for outlines, highlights, or custom lighting.
- Full-Screen Effects: Apply post-processing-like effects via blits (e.g., color grading, distortion, screen tinting).
- Pipeline-Friendly: Cleanly integrates with URP’s internal pipeline, respecting render order, camera stack, and XR.
- Reusable and Configurable: You can expose settings in the inspector for artists or designers to tweak without touching code.
- Efficient Resource Use: Avoids the overhead of camera-based image effects or hacks like hidden cameras.
- Per-Camera Control: Add/remove passes depending on which camera is rendering, ideal for multi-camera setups (UI, gameplay, minimaps).
- Custom Pass Injection Points: Choose when your code runs (e.g., before opaques, after transparents, etc.) via RenderPassEvent.
In summary, Render Features are the recommended URP-native way to customize rendering, whether you’re making gameplay effects, editor tools, or full custom pipelines.
Here’s a visual diagram showing where Render Passes fit in the URP frame rendering pipeline. This helps illustrate where custom logic can be injected using RenderPassEvent.

Example
Step 1: Create a minimal shader for outlining:
Shader "Custom/OutlineURP"
{
    Properties
    {
        _OutlineColor ("Outline Color", Color) = (0,0,0,1)
        _OutlineThickness ("Outline Thickness", Float) = 0.03
    }

    SubShader
    {
        Tags { "RenderType"="Opaque" "Queue"="Geometry+1" }

        Pass
        {
            Name "Outline"
            Tags { "LightMode" = "UniversalForward" }

            Cull Front
            ZWrite On
            ZTest LEqual

            HLSLPROGRAM
            #pragma vertex vert
            #pragma fragment frag
            #include "Packages/com.unity.render-pipelines.universal/ShaderLibrary/Core.hlsl"

            float _OutlineThickness;
            float4 _OutlineColor;

            struct Attributes
            {
                float4 positionOS : POSITION;
                float3 normalOS : NORMAL;
            };

            struct Varyings
            {
                float4 positionHCS : SV_POSITION;
            };

            Varyings vert(Attributes input)
            {
                Varyings output;

                // Expand vertex position along its normal in object space
                float3 expanded = input.positionOS.xyz +
                                  normalize(input.normalOS) * _OutlineThickness;

                float4 positionWS = TransformObjectToWorld(float4(expanded, 1.0));
                output.positionHCS = TransformWorldToHClip(positionWS.xyz);

                return output;
            }

            half4 frag(Varyings input) : SV_Target
            {
                return _OutlineColor;
            }
            ENDHLSL
        }
    }
}
Step 2: Create a script called OutlineRenderFeature.cs:
- OutlineRenderFeature: The main class extending URP renderer with a custom pass.
- OutlineRenderPass: The actual pass that draws the outline by rendering meshes with the outline shader.
- Create(): Finds shader, creates material and pass.
- AddRenderPasses(): Sets material properties and adds the pass to the renderer.
- Execute(): Draws opaque objects again with outline material.
using UnityEngine;
using UnityEngine.Rendering;
using UnityEngine.Rendering.Universal;

/// <summary>
/// Custom ScriptableRendererFeature that adds an outline effect by rendering
/// opaque objects a second time with a special outline material.
/// </summary>
public class OutlineRenderFeature : ScriptableRendererFeature
{
    /// <summary>
    /// Render pass that draws opaque objects again using the outline shader.
    /// </summary>
    class OutlineRenderPass : ScriptableRenderPass
    {
        // Identifies which shader pass to use ("UniversalForward" in URP)
        private ShaderTagId shaderTagId = new ShaderTagId("UniversalForward");
        // Filters what to render. In this case, only opaque objects
        private FilteringSettings filteringSettings;
        // Outline material to override the original materials
        private Material outlineMaterial;

        /// <summary>
        /// Constructor sets up filtering and render event.
        /// </summary>
        public OutlineRenderPass(Material mat)
        {
            // Run this pass after all opaque objects are rendered
            renderPassEvent = RenderPassEvent.AfterRenderingOpaques;
            // Only render opaque objects in this pass
            filteringSettings = new FilteringSettings(RenderQueueRange.opaque);
            // Store the outline material
            outlineMaterial = mat;
        }

        /// <summary>
        /// This is where the actual rendering work happens.
        /// </summary>
        public override void Execute(ScriptableRenderContext context,
                                     ref RenderingData renderingData)
        {
            // Set up draw settings using URP's built-in helper
            var drawSettings = CreateDrawingSettings(shaderTagId,
                                                     ref renderingData,
                                                     SortingCriteria.CommonOpaque);
            // Replace materials with the outline material for this pass
            drawSettings.overrideMaterial = outlineMaterial;
            // Use the first pass of the outline material (index 0)
            drawSettings.overrideMaterialPassIndex = 0;
            // Draw all renderers matching the filtering settings
            context.DrawRenderers(renderingData.cullResults,
                                  ref drawSettings,
                                  ref filteringSettings);
        }
    }

    // Public parameters exposed in the Inspector for customization
    public Color outlineColor = Color.black;
    public float outlineThickness = 0.03f;

    // Internal material instance using the custom outline shader
    private Material outlineMaterial;

    // Instance of the custom render pass
    private OutlineRenderPass outlinePass;

    /// <summary>
    /// Called when the renderer feature is first created or reset.
    /// </summary>
    public override void Create()
    {
        // Find the custom outline shader (must exist in the project)
        var shader = Shader.Find("Custom/Outline");
        if (shader == null)
        {
            Debug.LogError("Could not find shader 'Custom/Outline'");
            return;
        }

        // Create the outline material and render pass
        outlineMaterial = new Material(shader);
        outlinePass = new OutlineRenderPass(outlineMaterial);
    }

    /// <summary>
    /// Called every frame to inject the custom pass into the pipeline.
    /// </summary>
    public override void AddRenderPasses(ScriptableRenderer renderer,
                                         ref RenderingData renderingData)
    {
        // Don’t continue if the material is missing
        if (outlineMaterial == null)
            return;

        // Update the outline shader with the current settings
        outlineMaterial.SetColor("_OutlineColor", outlineColor);
        outlineMaterial.SetFloat("_OutlineThickness", outlineThickness);

        // Add the custom render pass to the renderer's queue
        renderer.EnqueuePass(outlinePass);
    }
}
Custom passes
A Custom Pass in HDRP (High Definition Render Pipeline) is a powerful, scriptable way to inject your own rendering logic into HDRP’s frame rendering process. Unlike URP’s Render Features, HDRP Custom Passes are designed to provide fine-grained control over when and how your custom rendering executes within the complex, high-fidelity HDRP pipeline.
A Custom Pass encapsulates rendering commands like drawing objects with specific shaders, performing full-screen effects, or manipulating render targets, all without modifying HDRP’s source code. You add Custom Passes to a Custom Pass Volume, which you place in your scene to control where and when these passes run.
Here’s why HDRP Custom Passes are essential:
- Advanced Rendering Control: Render objects with unique shaders, override materials, or apply effects under precise conditions, ideal for custom outlines, decals, or special visual effects.
- Full-Screen and Localized Effects: Implement post-processing-like effects, such as distortion, custom color grading, or volumetric overlays, that blend seamlessly with HDRP’s advanced lighting and post-processing.
- Pipeline-Integrated: Custom Passes respect HDRP’s render order, lighting, and post-processing stack, ensuring your effects integrate cleanly with reflections, shadows, and volumetrics.
- Scene-Based Control: Use Custom Pass Volumes to limit effect areas in the scene spatially, making it easy to localize your custom effects.
- Configurable and Reusable: Expose parameters in the inspector for artists and designers to tweak without touching the code, facilitating rapid iteration.
- Per-Camera and Layer Specific: Define which cameras or rendering layers your passes affect, supporting complex multi-camera setups or layered rendering workflows.
- Flexible Injection Points: Choose from various injection points during the frame rendering (before or after opaque/transparent objects, before post-processing, etc.) to precisely time your custom rendering operations.
In summary, HDRP Custom Passes are the official HDRP-native system to extend and customize rendering for high-fidelity visuals, enabling gameplay effects, editor tools, and highly tailored rendering without altering the core pipeline.
Here’s a visual diagram showing where custom Passes fit in the HDRP frame rendering pipeline. This helps illustrate where custom logic can be injected using RenderPassEvent.

Custom Pass Volumes in HDRP
A Custom Pass Volume is the container that tells HDRP where, when, and how custom rendering code should run. Think of it as a scene component that schedules and scopes Custom Passes.
Instead of injecting custom rendering globally (like URP’s Render Features), HDRP lets you place volumes in your scene. These can affect the whole view or just a specific 3D area.
Volume-Based System
HDRP’s rendering effects (post-processing, lighting overrides, etc.) use a Volume Framework. A Custom Pass Volume is just a specialized volume that stores one or more Custom Passes in its Custom Pass List.
- Global Volume: Always active for all cameras (great for full-screen effects).
- Local Volume: Only affects pixels inside its bounding box or shape (ideal for portals, in-world holograms, localized FX).
Here are some important facts:
- All passes inside the volume share the same injection point, which defines when in the frame passes run (e.g., Before Opaques, After Post-Processing).
- Passes inside the same volume execute in the order they’re listed.
- Multiple volumes at the same injection point stack together, with HDRP sorting them by priority.
- It’s possible to filter which cameras or object layers passes affect, making them selective without heavy scene-side scripting.
Custom pass volumes are powerful because they allow for:
- Spatial Control: Limit effects to a region, like a glowing shield around a character or a distortion bubble.
- Artist-Friendly: Artists can drag volumes around the scene, toggle them, and adjust parameters without changing code.
- Stackable & Reusable: Multiple passes can live in the same volume, and you can duplicate or move volumes across scenes.
- Clean Integration: Works with HDRP lighting, shadows, decals, post-processing, and temporal effects without breaking the pipeline.
For example example, to implement a localized portal effect:
- Add a Custom Pass Volume in the scene, set to Local mode.
- Shape the volume to match the portal mesh bounds.
- Add a Custom Pass that: a. Draws a masked view of another scene or camera into the portal. b. Adds a shimmering distortion on the edges. c. When the camera enters the volume bounds, the pass automatically activates; when it leaves, it deactivates.
This is how HDRP executes passes
Let’s assume two regions A, B that do not overlap each other.
- Global Custom Pass Volume runs its passes on every frame, everywhere.
- When the camera enters a Local Custom Pass Volume (e.g., Region A), the passes inside that volume also run, stacking on top of the global ones.
- If the camera is outside a local volume (Region B), those passes do not run.
- When multiple volumes are active at the same injection point, HDRP executes their passes in priority order, then by volume weight (like blending volumes).
This system allows to mix global full-screen effects with localized, spatially bounded effects, all controlled from volumes in the scene.
Example
Step 1: Create an HDRP-Compatible Unlit Shader for Outline
For HDRP, we typically use Shader Graph for compatibility and HDRP features. Here’s an example HLSL shader compatible with HDRP for an outline effect:
Shader "Custom/HDRP_Outline"
{
    HLSLINCLUDE
    #include "Packages/com.unity.render-pipelines.high-definition/Runtime/RenderPipeline/ShaderPass/ShaderPass.cs.hlsl"
    #include "Packages/com.unity.render-pipelines.core/ShaderLibrary/Common.hlsl"
    ENDHLSL

    SubShader
    {
        Tags { "RenderType" = "Opaque" }

        Pass
        {
            Name "OutlinePass"
            Tags{ "LightMode" = "SRPDefaultUnlit" }

            Cull Front
            ZWrite On
            ZTest LEqual

            HLSLPROGRAM
            #pragma vertex vert
            #pragma fragment frag

            float4 _OutlineColor;
            float _OutlineThickness;

            struct Attributes
            {
                float3 positionOS : POSITION;
                float3 normalOS : NORMAL;
            };

            struct Varyings
            {
                float4 positionCS : SV_POSITION;
            };

            float4 TransformObjectToHClip(float3 positionWS)
            {
                return mul(UNITY_MATRIX_VP, float4(positionWS, 1.0));
            }

            Varyings vert(Attributes IN)
            {
                Varyings OUT;
                float3 positionWS = TransformObjectToWorld(IN.positionOS);
                float3 normalWS = TransformObjectToWorldNormal(IN.normalOS);

                // Expand the position outward along its normal
                positionWS += normalWS * _OutlineThickness;

                OUT.positionCS = TransformObjectToHClip(positionWS);
                return OUT;
            }

            float4 frag(Varyings IN) : SV_Target
            {
                return _OutlineColor;
            }
            ENDHLSL
        }
    }
}
Step 2: Create the Custom Pass Script. Save as OutlineCustomPass.cs:
using UnityEngine;
using UnityEngine.Rendering;
using UnityEngine.Rendering.HighDefinition;

/// <summary>
/// HDRP custom pass that renders selected objects with an outline
/// material. Objects to be outlined should be placed in a specific
/// layer, defined by the layer mask.
/// </summary>
class OutlineCustomPass : CustomPass
{
    // Layer to filter objects that should receive outlines
    public LayerMask outlineLayer = 0;

    // Outline visual settings
    public Color outlineColor = Color.black;
    public float outlineThickness = 0.05f;

    // Shader used to render the outline
    [SerializeField] Shader outlineShader;

    // Material instance created from the shader
    private Material outlineMaterial;

    /// <summary>
    /// Called once when the custom pass is initialized.
    /// </summary>
    protected override void Setup(ScriptableRenderContext renderContext,
                                  CommandBuffer cmd)
    {
        // Load the outline shader from the project if not assigned
        if (outlineShader == null)
        {
            outlineShader = Shader.Find("Custom/HDRP_Outline");
        }

        // Create the material instance
        if (outlineShader != null)
        {
            outlineMaterial = new Material(outlineShader);
        }
    }

    /// <summary>
    /// Called every frame to execute the custom pass logic.
    /// </summary>
    protected override void Execute(CustomPassContext ctx)
    {
        if (outlineMaterial == null)
            return;

        // Set the outline parameters on the material
        outlineMaterial.SetColor("_OutlineColor", outlineColor);
        outlineMaterial.SetFloat("_OutlineThickness", outlineThickness);

        // Define what objects to render based on the outline layer
        var filtering = new FilteringSettings(RenderQueueRange.opaque,
                                              outlineLayer);

        // Create draw settings using the Unlit pass
        var drawSettings = CreateDrawingSettings(ctx.hdCamera.camera,
                                                 new ShaderTagId(
                                                     "SRPDefaultUnlit"),
                                                 SortingCriteria.CommonOpaque);

        // Override the material used to render selected objects
        drawSettings.overrideMaterial = outlineMaterial;
        drawSettings.overrideMaterialPassIndex = 0;

        // Render objects matching the filtering settings
        ctx.renderContext.DrawRenderers(ctx.cullingResults,
                                        ref drawSettings,
                                        ref filtering);
    }

    /// <summary>
    /// Called when the custom pass is disposed or the scene is unloaded.
    /// </summary>
    protected override void Cleanup()
    {
        // Ensure we clean up the material to avoid memory leaks
        CoreUtils.Destroy(outlineMaterial);
    }
}