Theory
Color Grading is the process of altering and enhancing the color of a motion picture, video image or still photograph, either electronically, photo-chemically or digitally [1]. This technique is commonly used in films and video games to alter the color palette for aesthetic and communicative purposes.
The following image from kaleidico.com demonstrates the overall effect. Drag the slider left or right to compare the two images. on the left side, the original photograph is shown. On the right side, the image has been color graded.


Implementation
The color grading operator is essentially a 3D function that transforms one RGB value to another. In a graphics context, color grading can be implemented as a simple post processing filter and the idea is to use a 3D texture as a look-up table to map RGB values produced by a renderer to the set of values that are used in the graded result.
An Artist Driven Approach
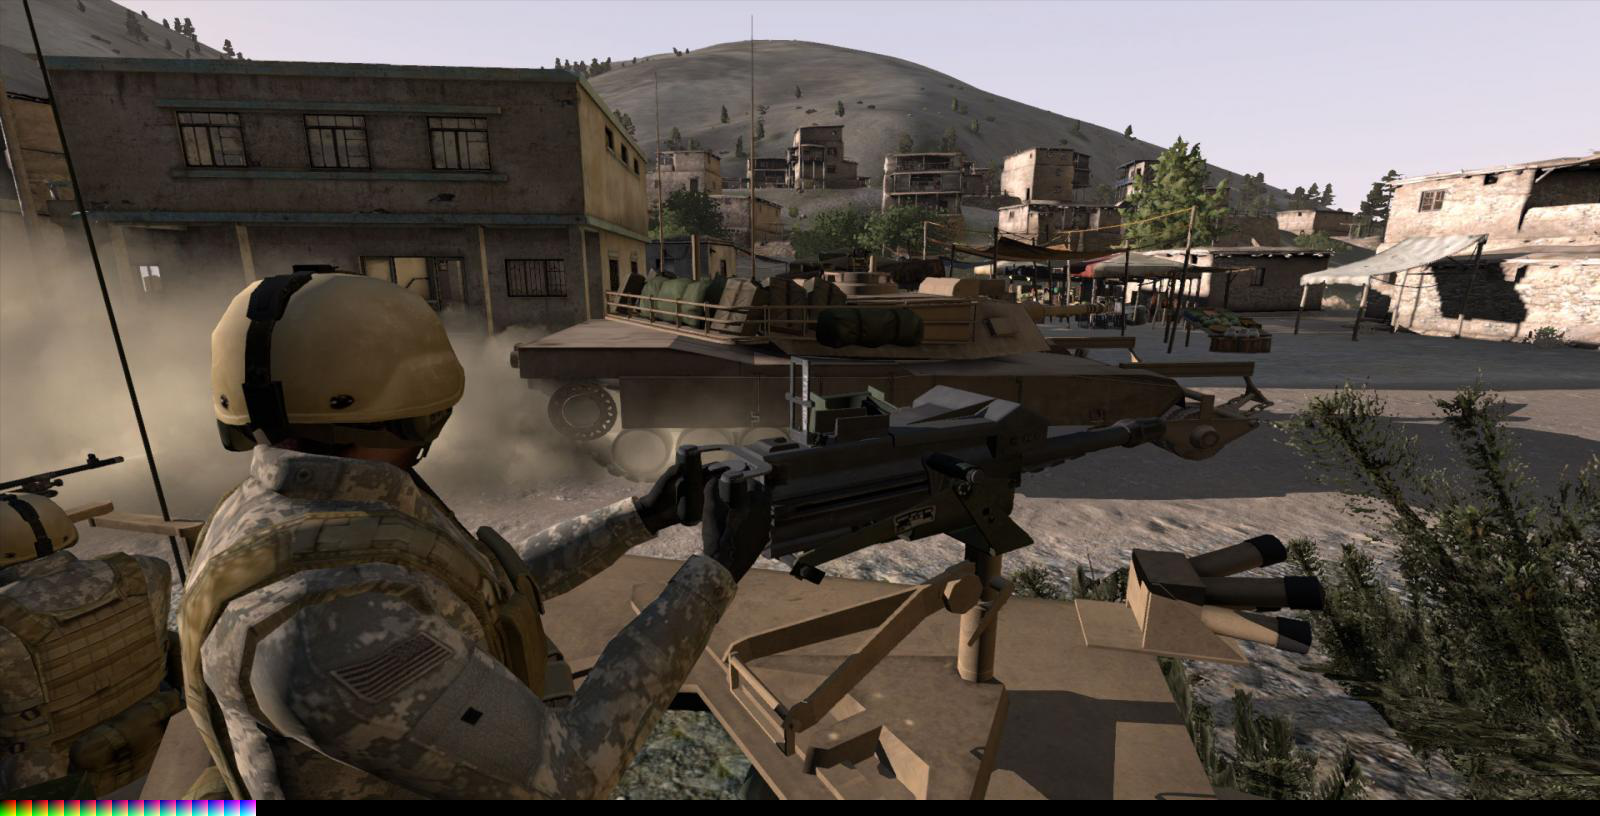
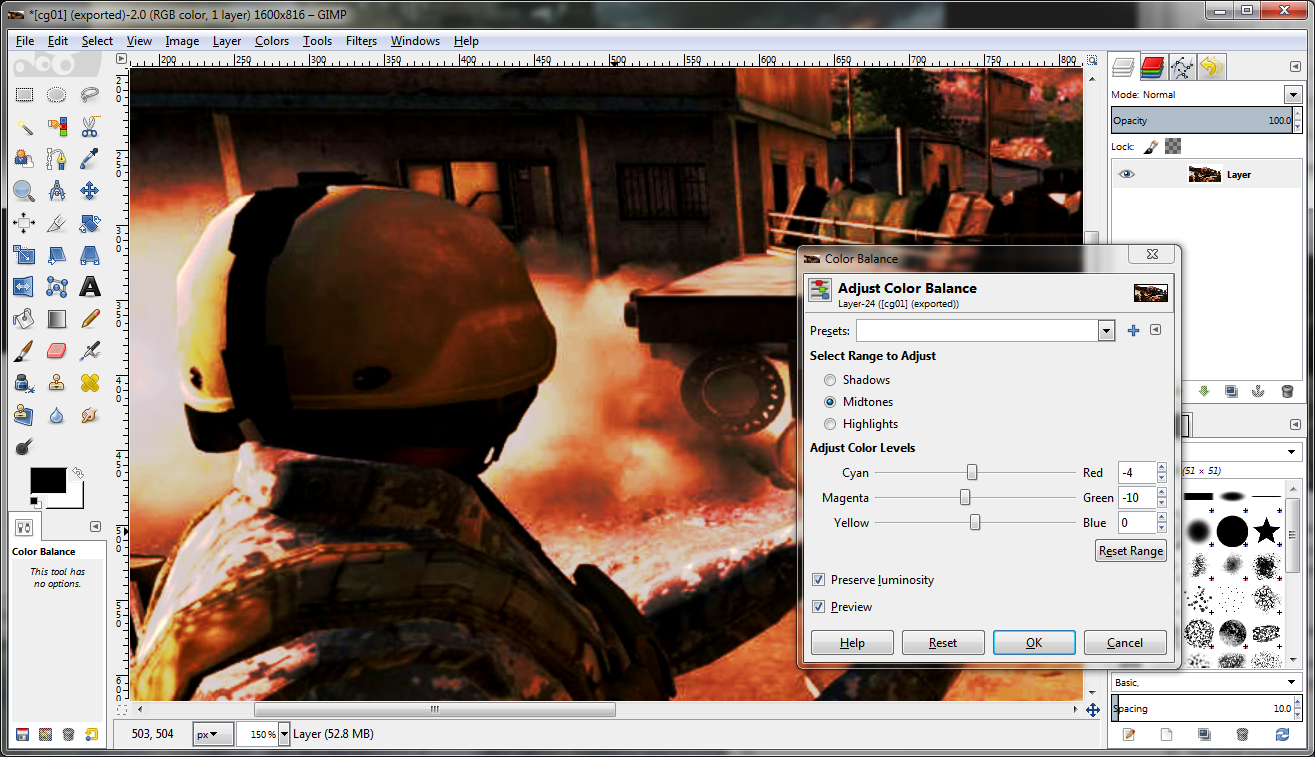
A simple approach can allow the artist to control the overall effect. A screenshot of the game is exported (in a lossless compression image format) and the palette is attached at the bottom.

The reference frame is then processed by the artist in a image editor. It’s important at this point to understand the limitations. The overall picture properties (Hue, Saturation, Brightness, Color Balance etc.) can be arbitrarily changed but modifying individual pixel values or applying filters (eg. Gaussian Blur) is strictly forbidden. The changes that the artist applies are reflected on the LUT at the bottom of the image.
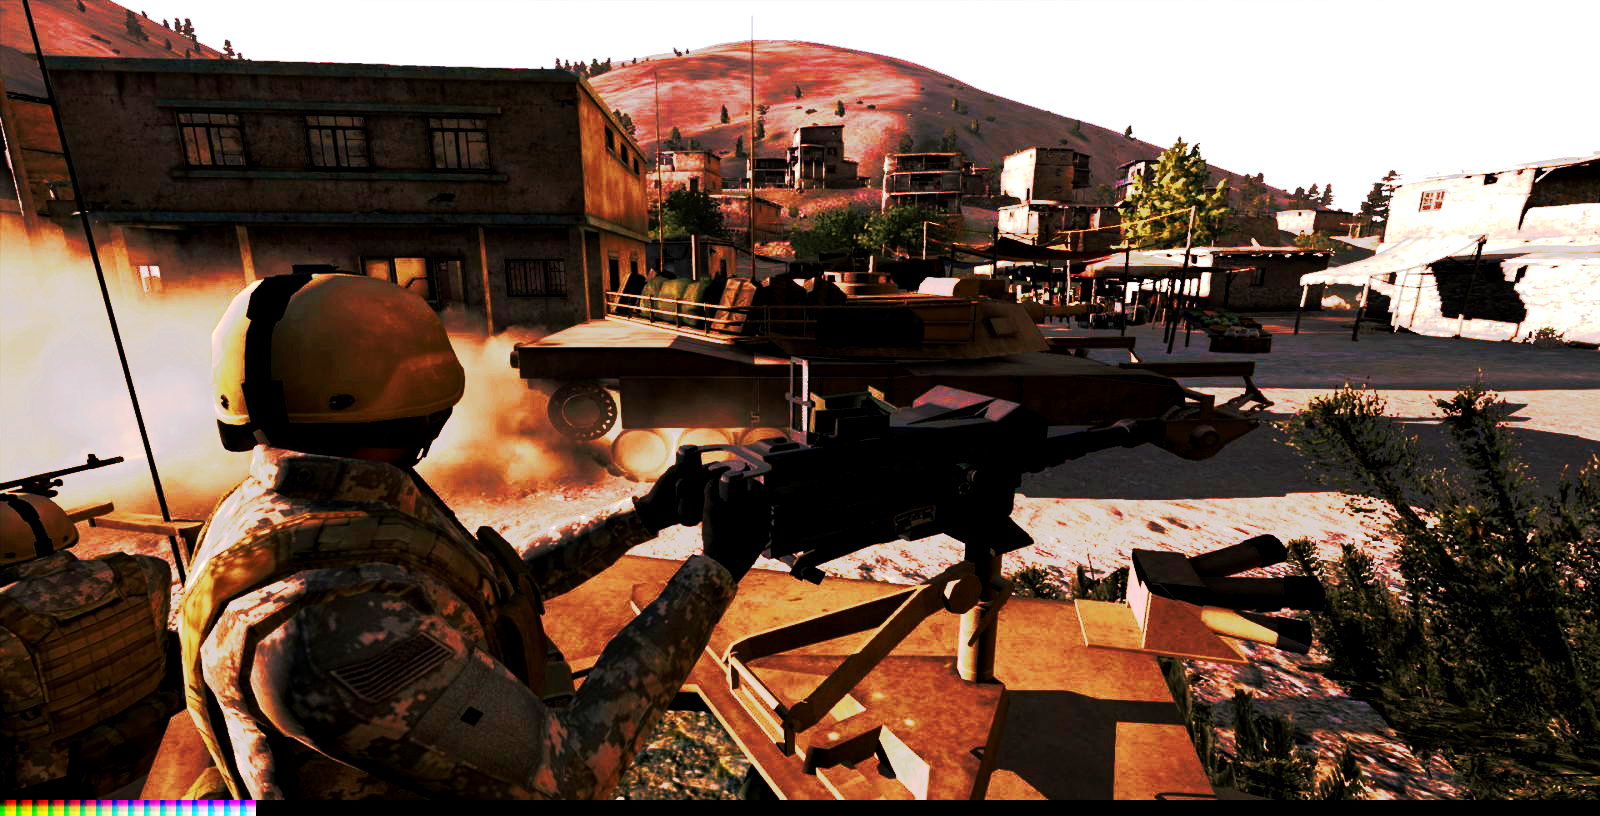
Below you can see an example of the final image.
The processed frame is finally imported in a simple tool that will extract the LUT from the bottom of the image and convert it to an appropriate 3D texture that will later be used in the respective post processing shader in game.
The post processing pass is very easy to implement in a fragment shader. Below you can see an example implementation in GLSL.
uniform sampler2D fb;  // The Framebuffer
uniform sampler3D lut; // The Color Grading Look Up Table
void main()
{
	vec3 col = texture2D(fb, gl_TextureCoord[0].st).xyz;
	gl_FragColor = vec4(texture3D(lut, col).xyz, 1);
}
It’s important to note that color grading should be done as one of the last steps in the post-fx chain in LDR space after tone mapping. Finally it’s worth mentioning that this technique can be used to achieve more complex effects such as simulating environmental lighting condition transitions by interpolating between 2 different look up tables. A simple script command can be used to control the effect and dynamically switch to different LUTs at runtime.